
This is the cheesecake I bake every year for birthdays.
It took me 3 tries to get the texture perfect — here’s how to nail it first try.
📋 Quick Recipe Overview
📅 Prep Time
30 minutes
30 minutes
🔥 Cook Time
1 hour 30 minutes
1 hour 30 minutes
🕒 Chill Time
10–12 hours
10–12 hours
🍰 Servings
12 slices
12 slices
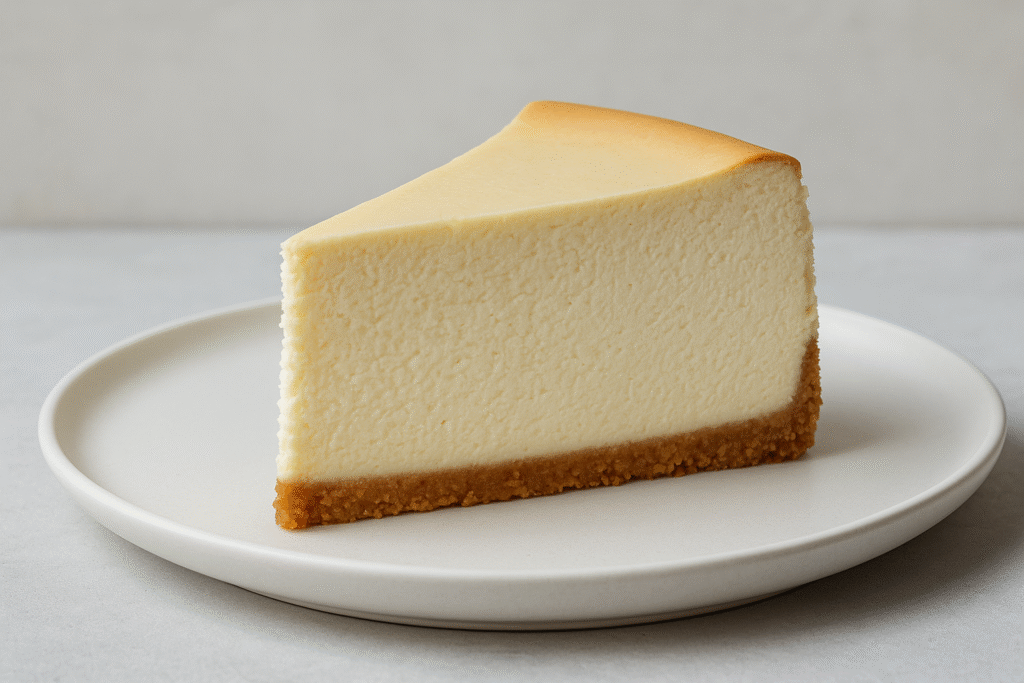
New York Style Cheesecake – Classic Creamy Recipe
A dense, rich, and creamy New York-style cheesecake with a classic graham cracker crust. This iconic dessert is known for its velvety texture and indulgent flavor, rivaling the cheesecakes from New York’s most beloved bakeries. A well-made New York cheesecake is ultra-creamy yet sturdy, with a subtle tang from cream cheese and a hint of vanilla and citrus. Follow this detailed recipe (inspired by top culinary sources) for a foolproof, bakery-quality cheesecake that’s simple enough even for beginners to master.
Servings: 12 people
Calories: 590kcal
Equipment
- 9-inch springform pan with 3 inch high sides, preferred
- Heavy-duty aluminum foil to wrap the pan and prevent leaks in the water bath
- Large roasting pan to create a water bath for baking
- Electric mixer stand mixer with paddle attachment or hand mixer
- Mixing bowls, rubber spatula, and a kettle or pot for boiling water
Ingredients
For the Crust (9-inch base)
- 2 cups graham cracker crumbs about 15 whole graham crackers, finely crushed
- 2 tbsp granulated sugar
- 5-6 tbsp unsalted butter melted
- pinch of salt enhances flavor in the crust
For the Cheesecake Filling
- 32 oz full-fat cream cheese (4 packages) at room temperature
- 1½ cups granulated sugar for balanced sweetness
- 3 tbsp all-purpose flour helps prevent cracks and stabilizes the filling
- ¼ tsp salt balances the sweetness and enhaces flavor
- 2 tsp pure vanilla extract for warmth and flavor
- 1 tsp lemon zest
- 2 tsp fresh lemon juice
- 6 large eggs at room temperature
- 1 cup full-fat sour cream at room temperature
- ½ cup heavy cream at room temperature
Instructions
1. Prepare the Crust
- 1. Preheat & Prep Pan: Preheat oven to 350°F (175°C). Lightly grease the bottom and sides of a 9-inch springform pan. Wrap the outside of the pan (bottom and sides) with two layers of heavy-duty foil, making sure it’s tightly sealed without gaps. (This prevents water from leaking in during the water bath.)2. Mix Crust: In a bowl, combine graham cracker crumbs, sugar, and a pinch of salt. Pour in melted butter and stir until the mixture resembles wet sand.3. Press & Pre-bake: Press the crumb mixture firmly into the bottom of the prepared pan, creating an even layer (you can press a bit up the sides, about ½ inch, for a slight border). Use the bottom of a glass or measuring cup to tamp it down tightly. Bake the crust for 10 minutes at 350°F, until just set. Remove from oven and let it cool slightly. Reduce oven temperature to 325°F (163°C) for the cheesecake filling.
2. Make the Cheesecake Filling
- 1. Beat Cream Cheese Base: In a large mixing bowl, beat the softened cream cheese, sugar, flour, and salt together on medium speed until completely smooth and creamy (about 1–2 minutes). Tip: Scrape down the sides and bottom of the bowl to ensure no lumps remain. Avoid high speed or over-beating at this stage – mix just until smooth.2. Add Flavorings: Add the vanilla extract, lemon zest, and lemon juice. Beat on low speed until just combined. These add flavor but shouldn’t be overmixed.3. Add Eggs Gradually: With the mixer on LOW speed, add the eggs one at a time, mixing just until each egg is incorporated before adding the next. Scrape down the bowl as needed. Over-mixing eggs can incorporate too much air, which may cause cracking. Once eggs are mixed in, the batter should be smooth; do not beat vigorously.4. Blend in Sour Cream & Heavy Cream: Add the sour cream and heavy cream, mixing on low speed until just combined. Stop as soon as the batter looks uniform. (Excess mixing at this stage can aerate the batter, leading to a cheesecake that puffs up then cracks as it cools.) The final batter will be thick and creamy.5. Prep Water Bath: Place the foil-wrapped springform pan (with cooled crust) into a large roasting pan. If you haven’t already, boil a kettle or pot of water. Pour the cheesecake filling into the crust, smoothing the top with a spatula. Now, carefully pour the hot water into the roasting pan around the springform pan, creating a water bath. Add enough water to come about halfway up the sides of the springform pan. Tip: Pour slowly to avoid splashing water onto the cheesecake. (The water bath provides gentle, even heat and a humid environment, which keeps the cheesecake creamy and helps prevent cracks.).6. Bake Gently: Place the entire setup (roasting pan with cheesecake) into the oven. Bake at 325°F for about 1 hour 30 minutes to 1 hour 45 minutes. Do not open the oven during baking. The cheesecake is done when the edges are lightly puffed and appear set, but the center 2-3 inches still jiggle slightly like gelatin when you nudge the pan. The top may be very light golden. If you see the cake starting to crack or the center looking puffed, it’s likely done or even slightly over-baked – proceed to the cooling step.*Note: If the top is browning too much toward the end, you can tent a piece of foil loosely over the cake to prevent over-browning.
3. Cool and Chill (Avoiding Cracks)
- 1. Gradual Oven Cooling: When the cheesecake has finished baking, turn off the oven. Do not remove the cheesecake yet. Crack open the oven door about an inch (you can use a wooden spoon to prop it open). Let the cheesecake cool slowly in the oven for about 30 minutes to 1 hour. This gentle cooling prevents the sudden temperature change that can cause cracking.2. Water Bath Removal: After this initial cooling, carefully remove the roasting pan from the oven. Use caution – the water will be very hot. Lift out the springform pan from the water bath. (It can help to use oven mitts and place the pan on a kitchen towel to catch drips.) Peel away and discard the foil from around the pan.3. Loosen Edges: While the cheesecake is still warm, run a thin-bladed knife or offset spatula around the inside edge of the cheesecake to loosen it from the pan. This also helps prevent cracks as it contracts during cooling. Do not remove the springform sides yet.4. Room-Temp Cooling: Place the cheesecake (still in pan) on a wire rack and let it cool to room temperature. This may take another hour.5. Chill Thoroughly: Once the cake is no longer warm, cover the pan tightly with plastic wrap or foil (avoid touching the top of the cake). Refrigerate for at least 8 hours, or preferably overnight. Extended chilling is crucial – the cheesecake will set to a firm, velvety texture and the flavors will improve. Do not rush this step; a well-chilled cheesecake is much easier to slice and tastes best.6. Release & Serve: When ready to serve, unclasp and gently remove the springform pan sides. If you have trouble, you can warm the sides of the pan slightly with a hot towel or hair dryer to release it more easily. Slide the cheesecake onto a serving platter (it’s okay to serve on the pan base if transferring is difficult). For clean slices, use a sharp knife dipped in hot water and wiped dry between cuts
Video
Notes
Tips for the Perfect New York Cheesecake
Use Quality, Full-Fat Ingredients: For the signature creamy texture, use full-fat brick-style cream cheese (no low-fat or whipped tubs). New York cheesecake is all about richness, so this is not the place to skimp on fat. Similarly, use real sour cream and heavy cream (or Greek yogurt as a sub for sour cream) if included – the combination of both gives an ultra-creamy result. Room Temperature Ingredients: Ensure all dairy and eggs are at room temperature before mixing. Cold cream cheese or eggs don’t blend smoothly and will require more mixing (which you want to avoid). Room-temp ingredients combine easily into a homogenous batter without overmixing. Avoid Over-Mixing: Over-beating the batter (especially after adding eggs) can incorporate excess air, leading to a cheesecake that rises and then cracks or sinks. Do the majority of mixing when creaming the cream cheese and sugar before adding eggs. Once eggs are added, mix on low speed and stop as soon as the mixture is smooth. Tip: After all ingredients are incorporated, tapping the bowl on the counter a few times can help pop any tiny air bubbles. Water Bath is Worth It: Baking the cheesecake in a water bath (bain-marie) is the best insurance against cracking and dryness. The steam keeps the environment moist, preventing a dry top, and the water insulates the cake for gentle, even baking. Alternative: If you absolutely cannot do a water bath, place a large pan of hot water on the lower rack of the oven while the cheesecake bakes (this creates steam without submerging the cake). Be aware skipping the water bath may result in a drier, more crack-prone cake. Know When It’s Done: It can be tricky to judge doneness, but remember that cheesecake continues to cook as it cools. The center should wobble like Jell-O when you gently shake the pan; it should not be liquidy. The outer 2-3 inches will be relatively set and may have puffed slightly. If the entire cake is firm in the oven, it may be over-baked. In that case, go straight to the cooling step – a few small surface cracks are okay and won’t affect taste. Cool Slowly to Prevent Cracks: Sudden temperature changes are a cheesecake’s enemy. That’s why the cake is cooled in stages: first sitting in the turned-off oven, then at room temp, then refrigerated. This gradual cooling minimizes cracking due to contraction. Also, loosening the cake from the pan while warm (with a knife around the edge) ensures it doesn’t stick to the sides as it contracts. Cracks Happen – Don’t Panic: Even if you get a crack or two, it’s not a disaster and not a sign of failure. It’s mostly cosmetic. You can cover cracks with toppings like sour cream, fruit sauce, or whipped cream and no one will mind. A well-chilled cheesecake that cracked will still taste as creamy and delicious as ever.Serving Suggestions
Serve Chilled: New York cheesecake is best served cold, or at least cool. It’s after thorough chilling that the cheesecake achieves its silky, velvety texture. For clean slices, use a hot dry knife as noted. Serve straight from the fridge, or let slices sit at room temp for about 20 minutes if you prefer a softer texture. Avoid cutting while the cake is warm, or it may be too soft and custardy. Classic Toppings: This cheesecake is fantastic plain, but you can elevate it with toppings. Popular options include fresh strawberry slices or a berry sauce (e.g. strawberry or raspberry sauce) drizzled over the top. To make a simple berry sauce, simmer berries (fresh or frozen) with a few tablespoons of sugar and a squeeze of lemon until they break down into a chunky sauce. Cool it and spoon over each slice. Other Toppings: A dollop of whipped cream and some fresh berries is a lovely finishing touch (the lightness of whipped cream complements the dense cake). You can also drizzle warm caramel or chocolate ganache for an ultra-decadent treat. Another New York touch is a sour cream topping: mix 2 cups sour cream with 1/3 cup powdered sugar and 1 tsp vanilla, then spread on top of the cooled cheesecake and chill – this gives a sweet tangy layer (as used in some deli-style cheesecakes). Garnish: A simple garnish of lemon zest curls or a few fresh mint leaves can add color, especially if serving with fruit. But honestly, a classic New York cheesecake needs no fancy adornment – its creamy flavor steals the show!Make-Ahead, Storage, and Freezing
Make-Ahead: Cheesecake is an excellent make-ahead dessert. You can make it up to 2-3 days in advance of serving. In fact, it’s often better on the second day as the flavors deepen. Keep it covered in the refrigerator (in the springform pan for convenience) until ready to serve. Add any perishable toppings (fresh fruit, etc.) just before serving. Refrigerator Storage: Cover leftovers tightly and store in the fridge. Cheesecake will stay fresh for about 4-5 days refrigerated. When storing, avoid keeping it at room temperature for more than 2 hours at a time, as the high dairy content can spoil or become unsafe if left out too long. Always return it to the fridge promptly after serving. Freezing: New York cheesecake freezes very well due to its high fat content. To freeze, chill it thoroughly first (so it is firm). You can freeze the whole cake or individual slices. Wrap the cheesecake (or each slice) in plastic wrap, then in aluminum foil (or place in heavy-duty freezer bags) to prevent freezer burn. Freeze for up to 2 months for best quality. (Some sources say up to 3 months is okay.) Thawing: To thaw, transfer the wrapped cheesecake to the refrigerator overnight until completely defrosted. For slices, you might need only a few hours in the fridge to thaw. Avoid thawing at room temperature (and never in the microwave or oven), as that can compromise the texture or cause melting. Once thawed, it will taste as fresh as newly baked.💡 Pro Tips for a Crack-Free Cheesecake
- Don’t overmix the eggs – mix just until incorporated
- Use room-temperature ingredients
- Always bake in a water bath
- Cool slowly in the oven, then in the fridge overnight
FAQS
Can I freeze it?
Yes, freeze slices individually. Wrap well and thaw in fridge overnight.
Why did mine crack?
Overbaking or rapid cooling usually causes that. It’ll still taste amazing!
🍽️ How to Serve It
- Chilled with fresh berries or berry sauce
- With a swirl of whipped cream
- Top with caramel for an indulgent twist
🧊 Storage & Make-Ahead
This cheesecake keeps for up to 5 days in the fridge. You can freeze it in slices for up to 2 months.

⭐ Tried This Recipe?
Leave a comment and ⭐️⭐️⭐️⭐️⭐️ rating below. Tag me on Instagram @snackye so I can see your cheesecake!